Heat Shrink Tubing Heating Machine
Hot Air Manual Rotary Table Product Specific Fixtures
Apply timed hot air to tubing already fitted to a workpiece.
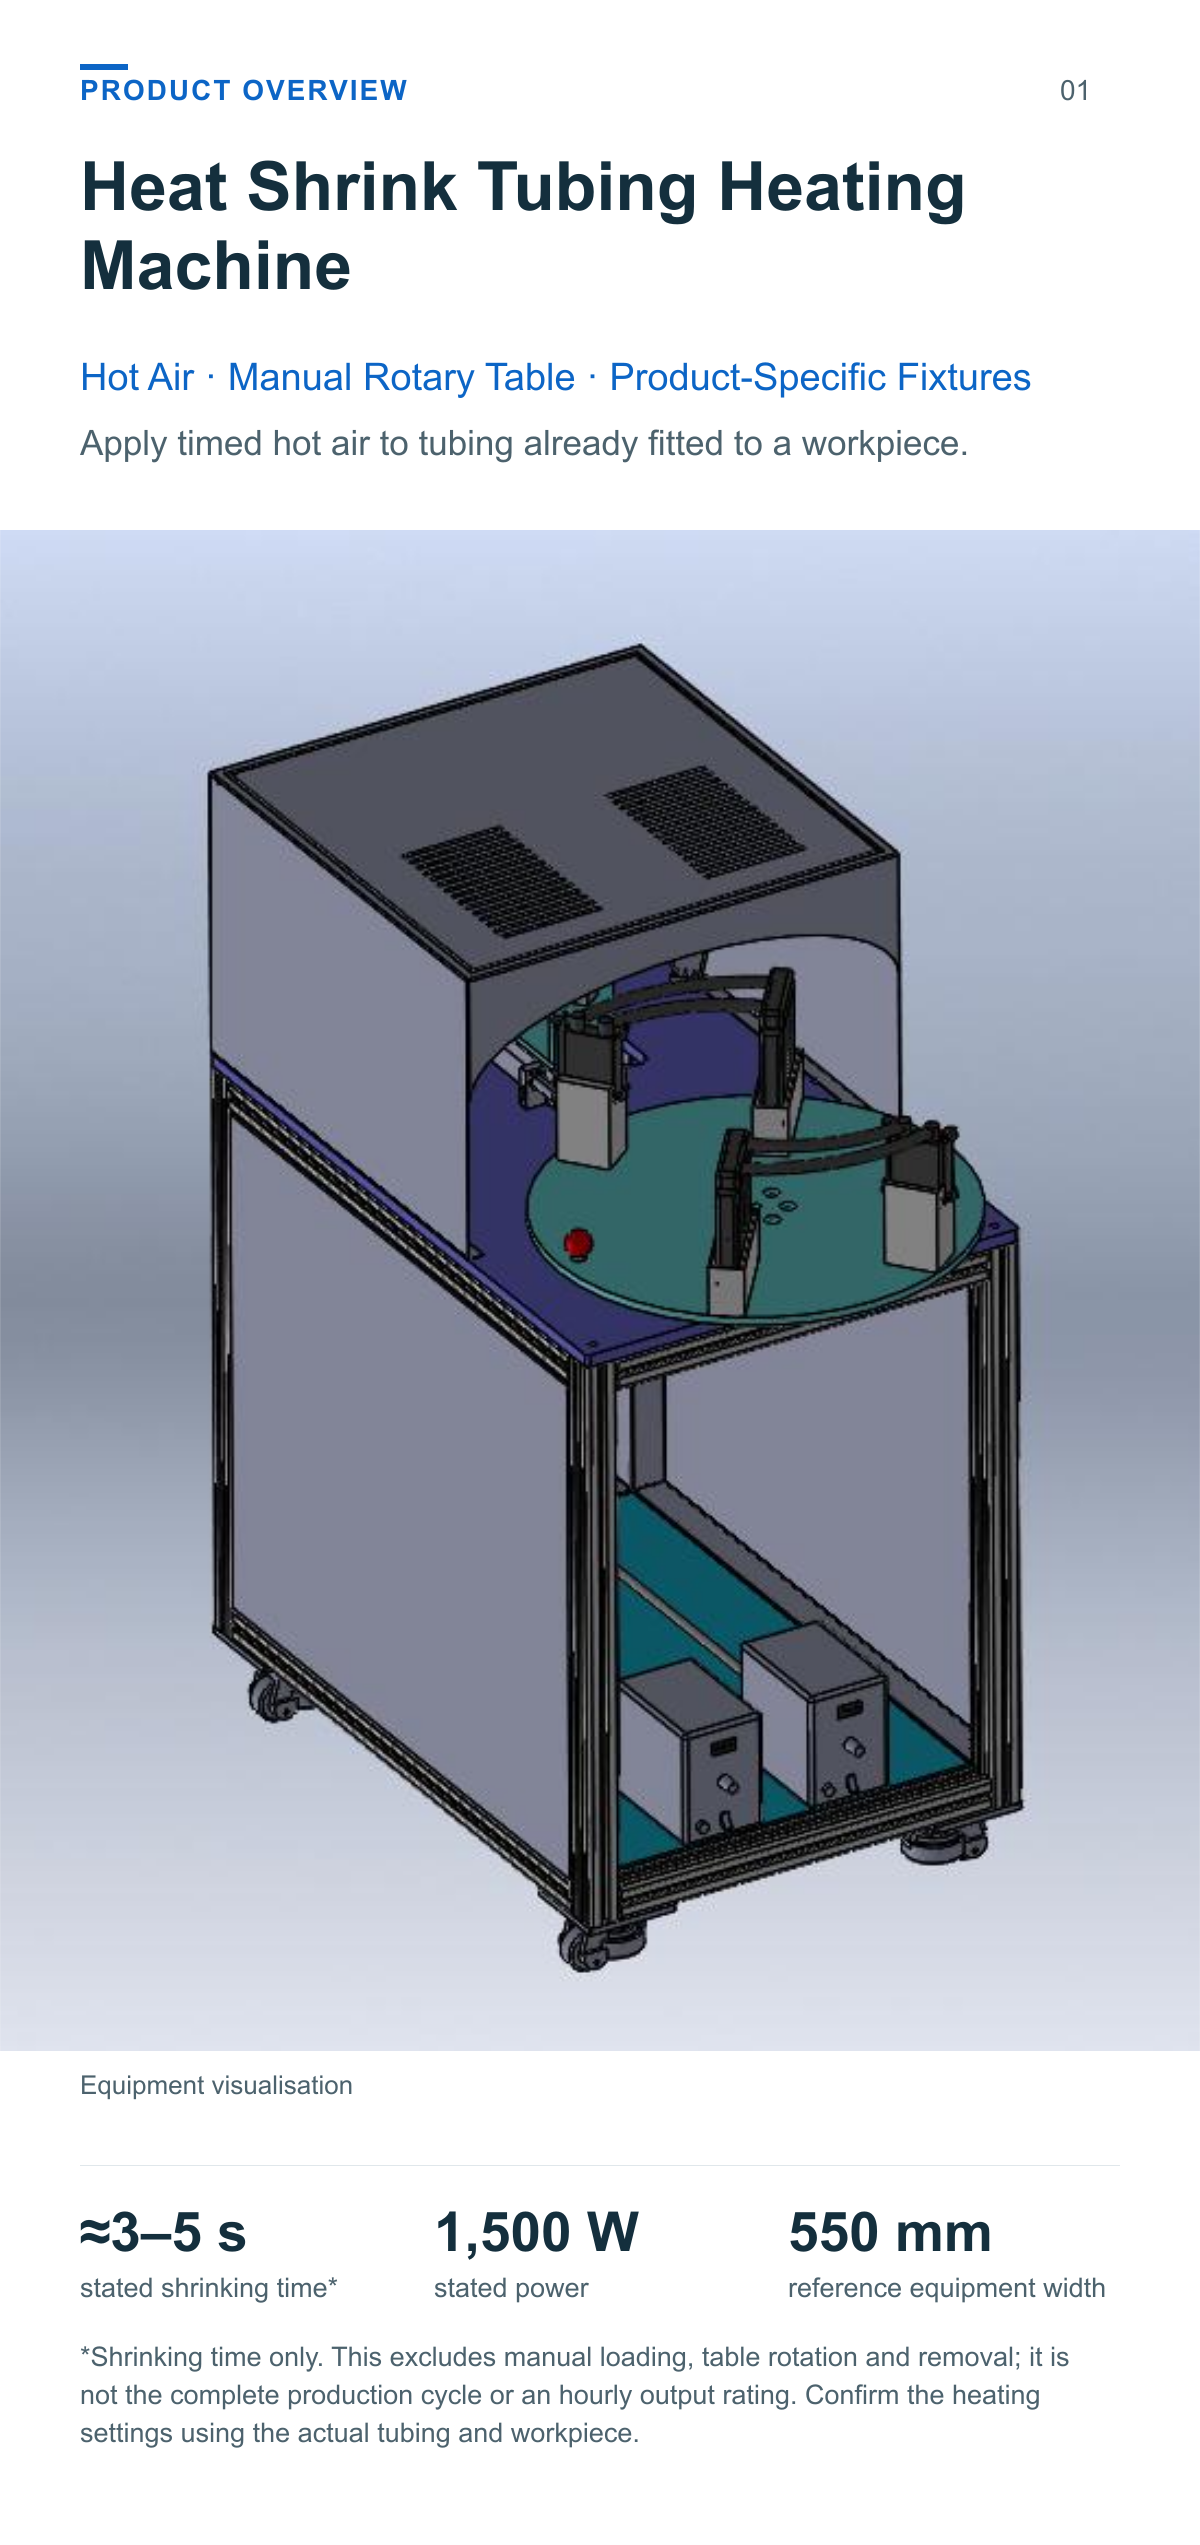
This heat shrink tubing heating machine combines product-specific fixtures, a manually rotated worktable and timed hot-air blowing. The operator loads the prepared workpiece and turns the handle to move it between the loading and heating positions.
≈3–5 s stated shrinking time*
1,500 W stated power
550 mm reference equipment width
*Shrinking time only. This excludes manual loading, table rotation and removal; it is not the complete production cycle or an hourly output rating. Confirm the heating settings using the actual tubing and workpiece.
Heating for pre sleeved workpieces
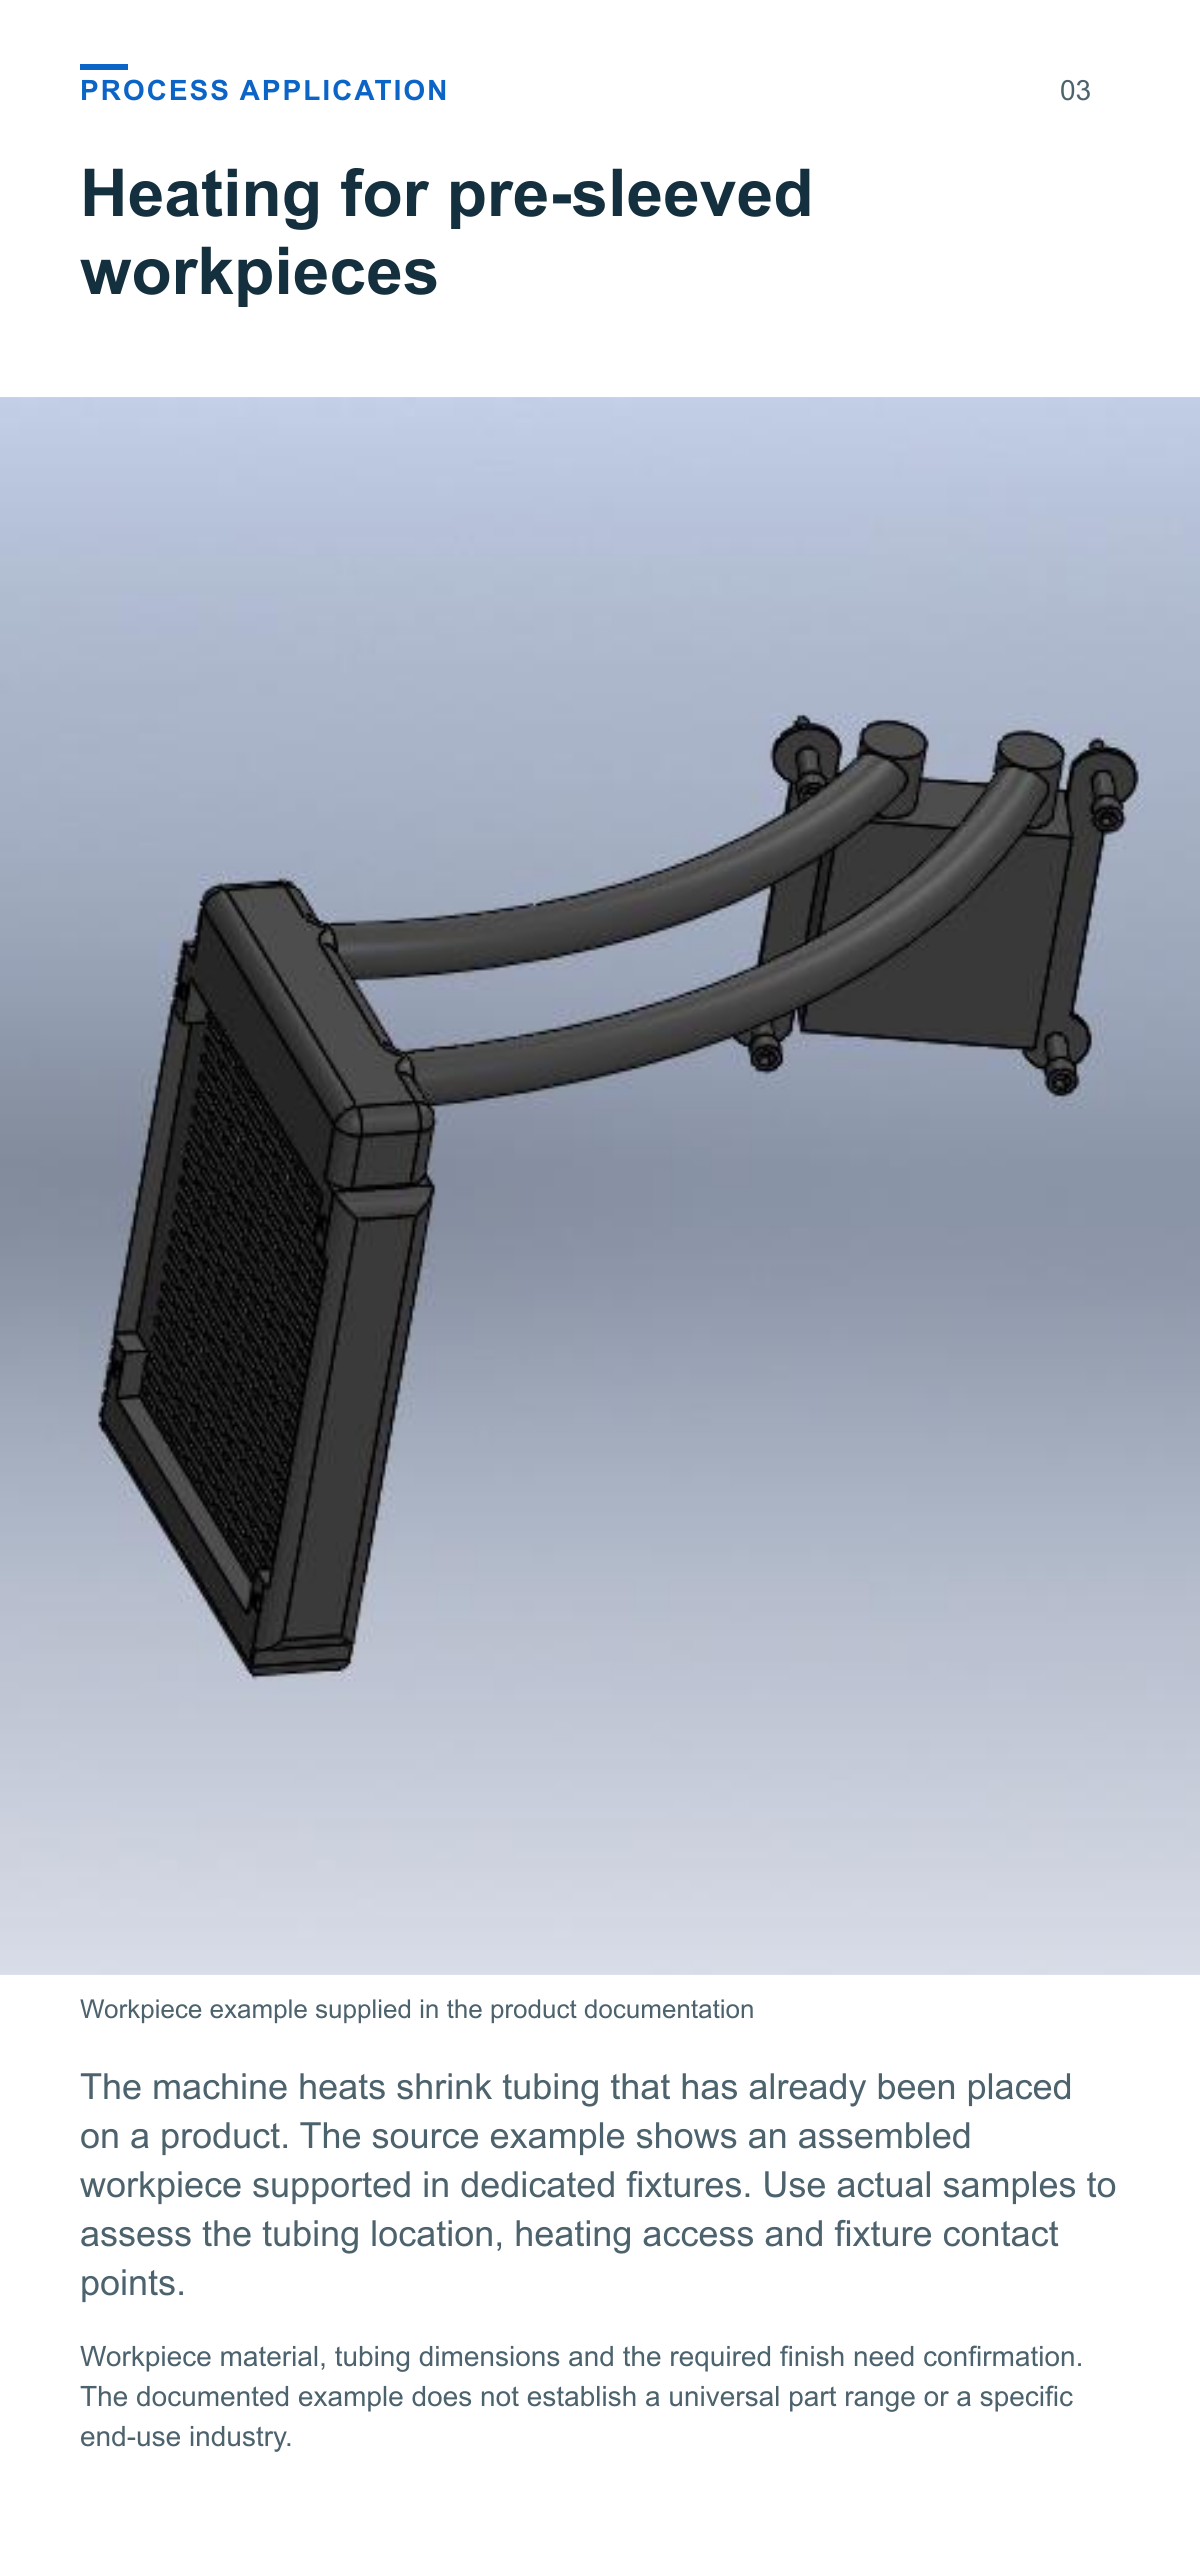
The machine heats shrink tubing that has already been placed on a product. The source example shows an assembled workpiece supported in dedicated fixtures. Use actual samples to assess the tubing location, heating access and fixture contact points.
Load turn heat and remove
Manual loading and handle-operated rotation connect the loading position with the hot-air shrinking position. The hot-air blowing time can be set for the application.
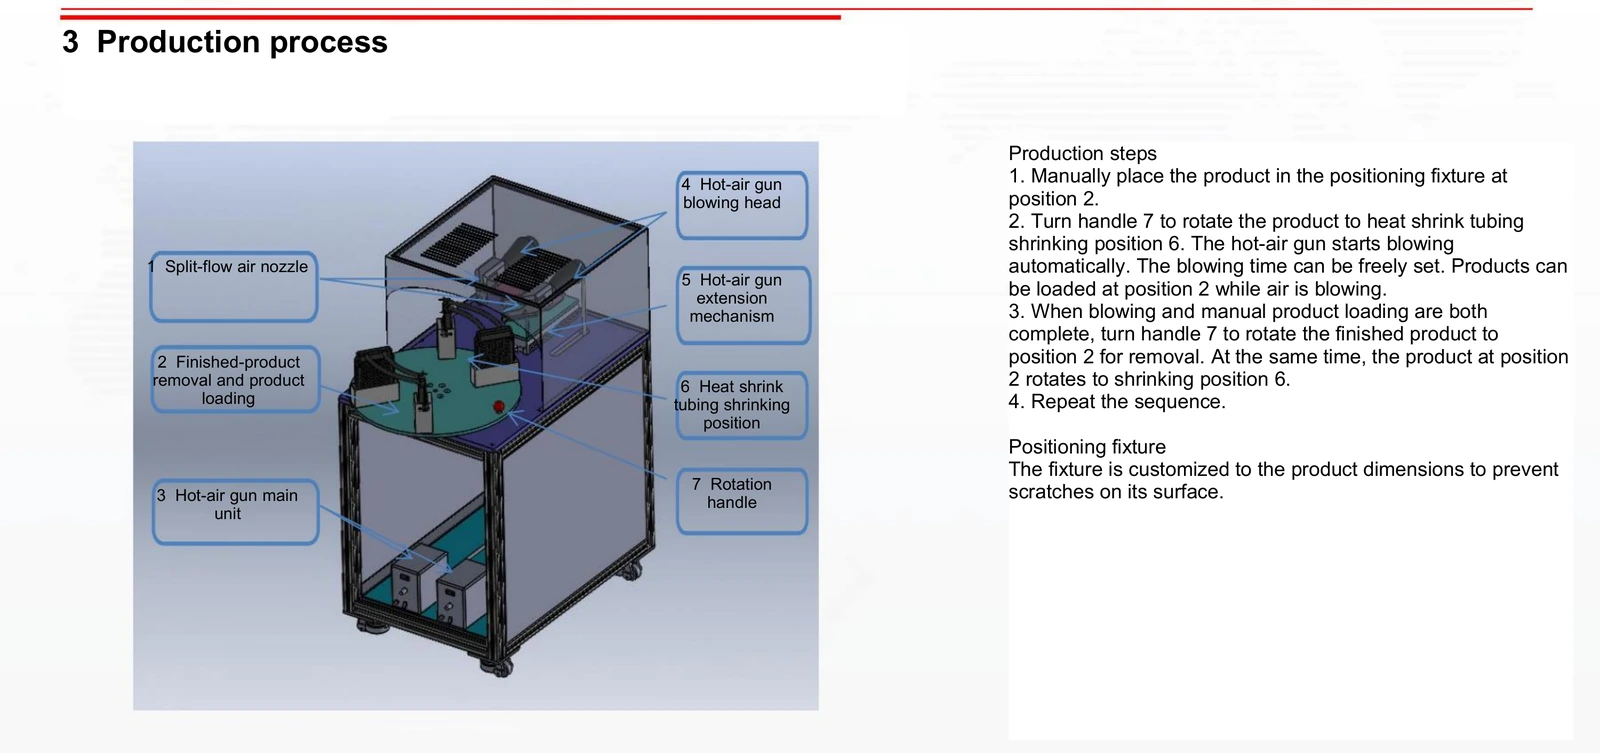
Load the prepared workpiece Manually place the product, with tubing already fitted, into the positioning fixture at the loading position.
Turn the rotation handle The operator turns the handle to move the workpiece to the heating position.
Run the timed heating step The hot-air gun starts blowing automatically. While it heats, the operator can load the next workpiece at the loading position.
Turn back and remove When heating and manual loading are complete, turn the handle to return the heated workpiece for removal and move the next workpiece to the heating position.
A workstation for controlled part handling
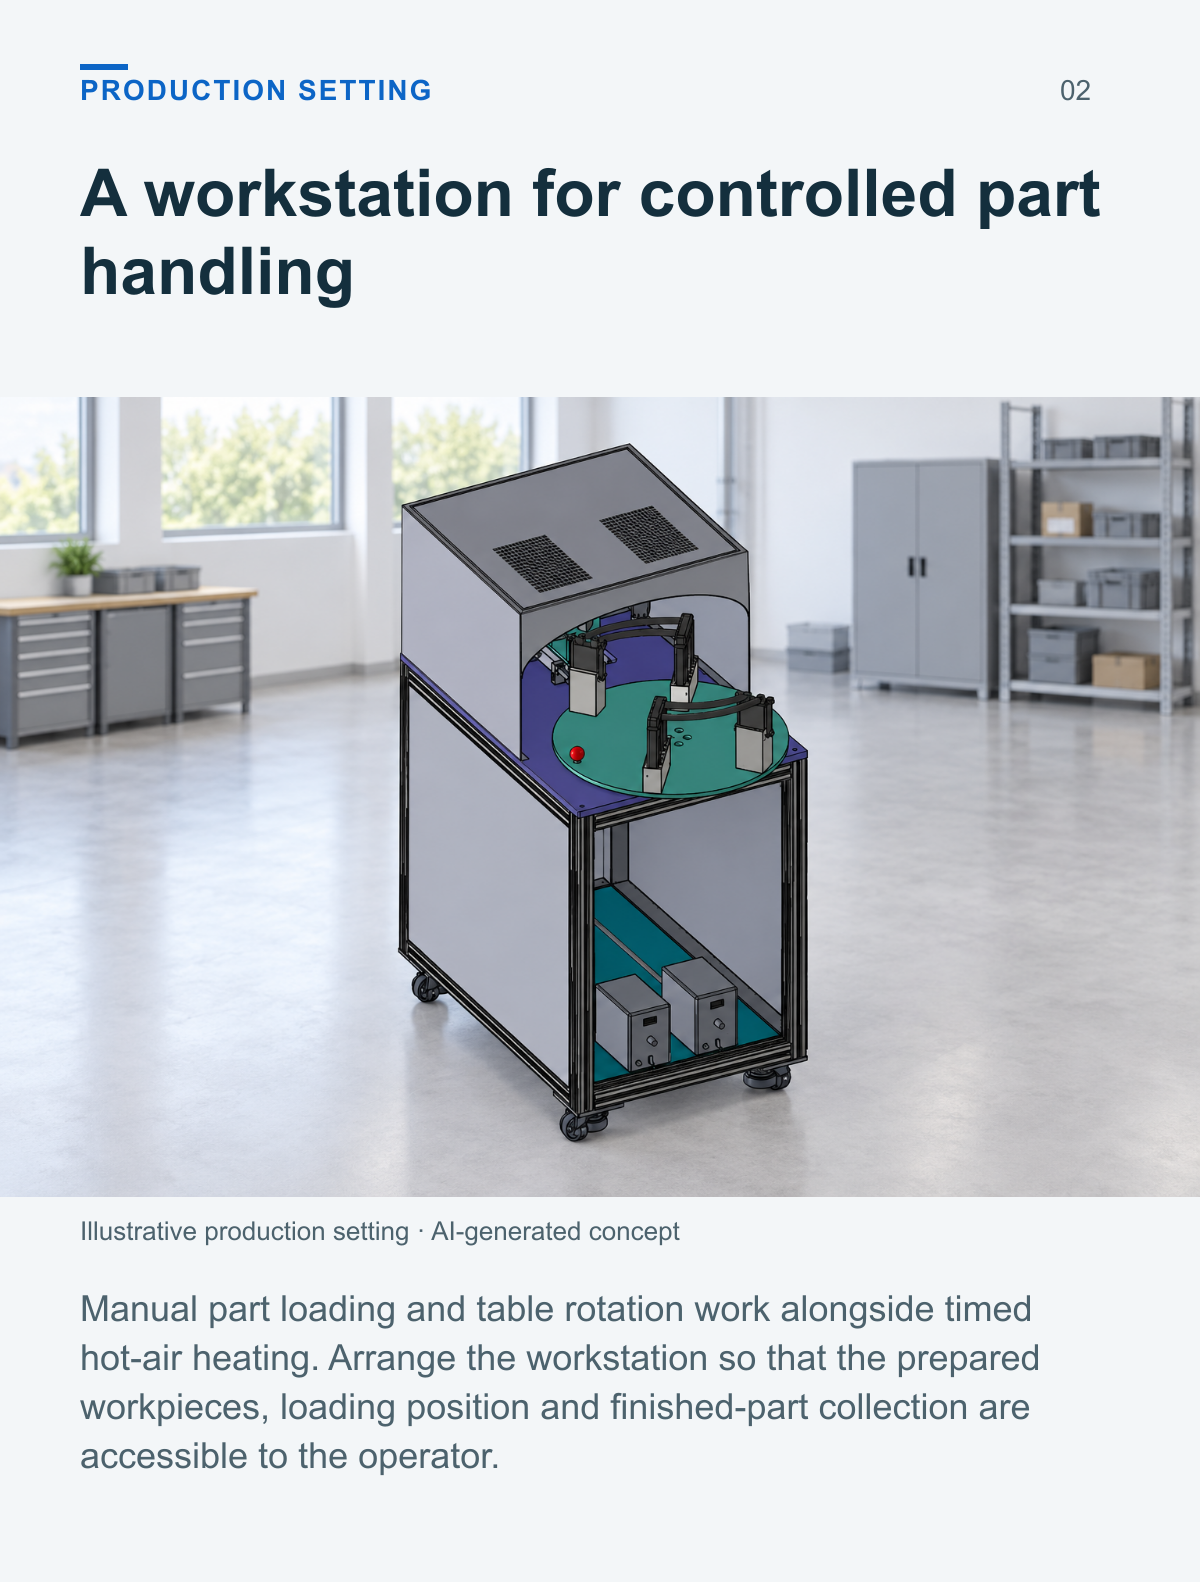
Manual part loading and table rotation work alongside timed hot-air heating. Arrange the workstation so that the prepared workpieces, loading position and finished-part collection are accessible to the operator.
Review the part before setting the process
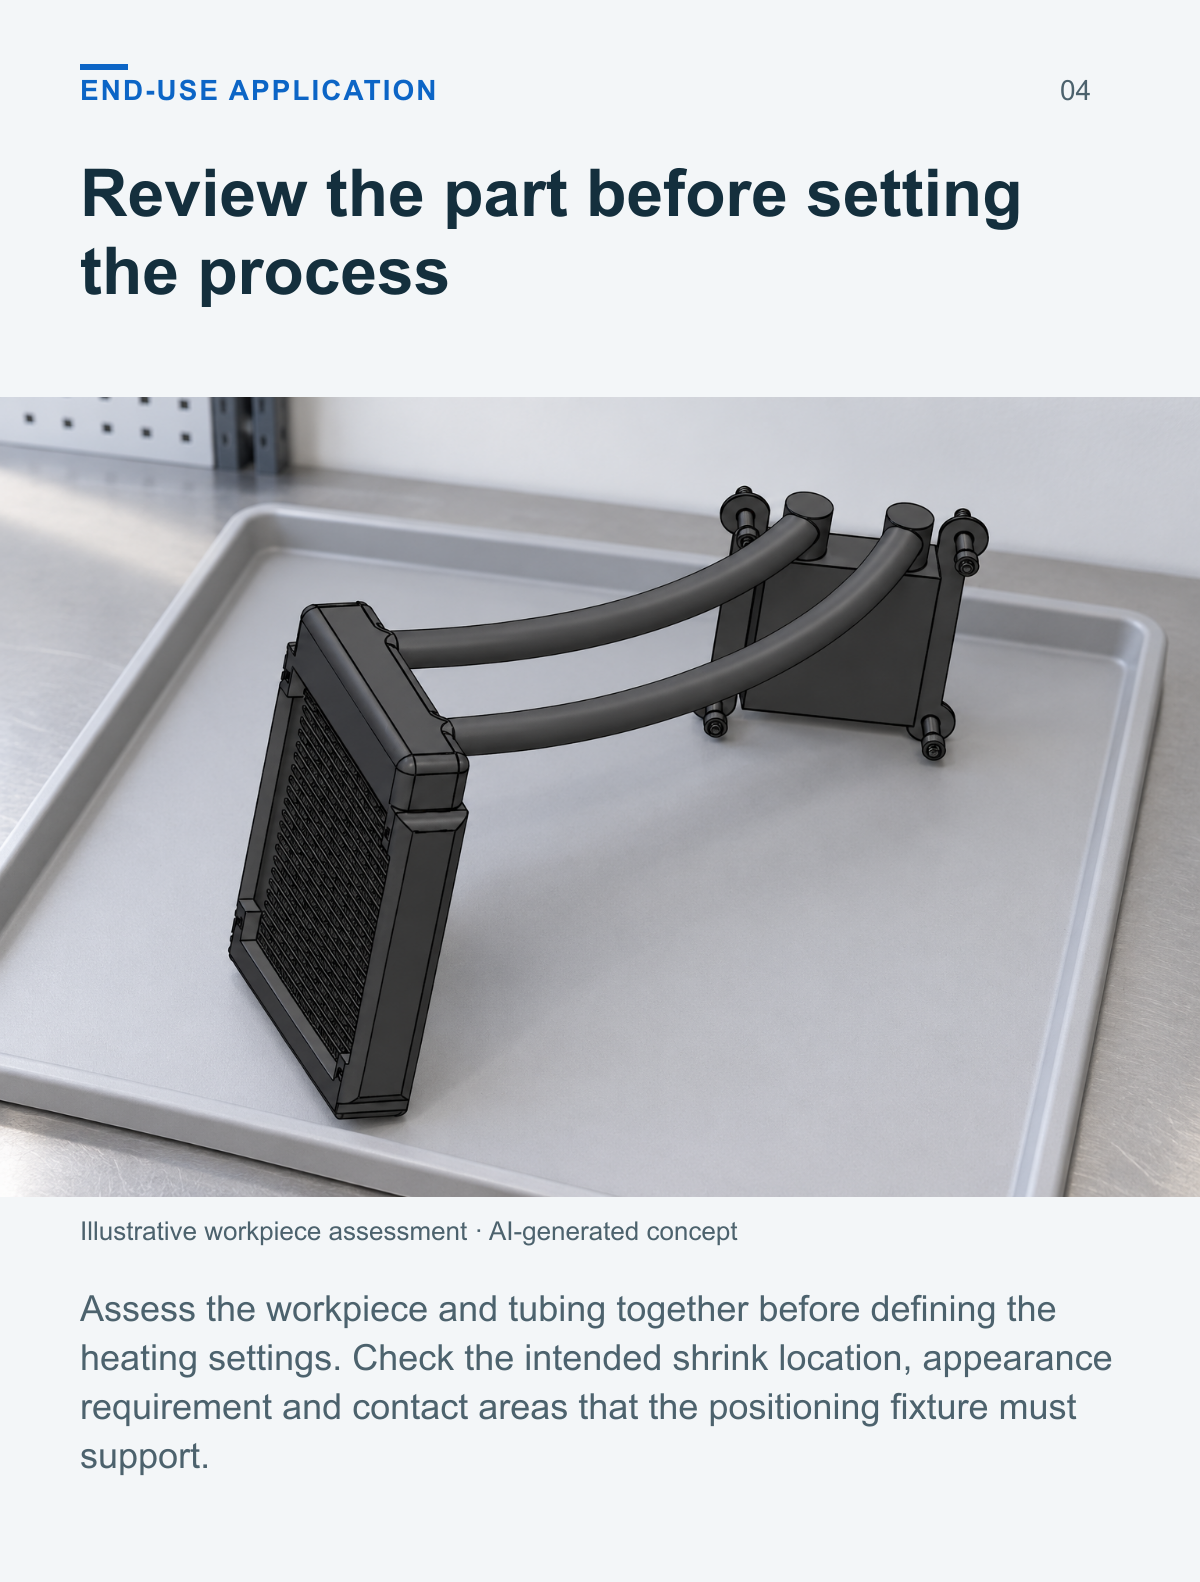
Assess the workpiece and tubing together before defining the heating settings. Check the intended shrink location, appearance requirement and contact areas that the positioning fixture must support.
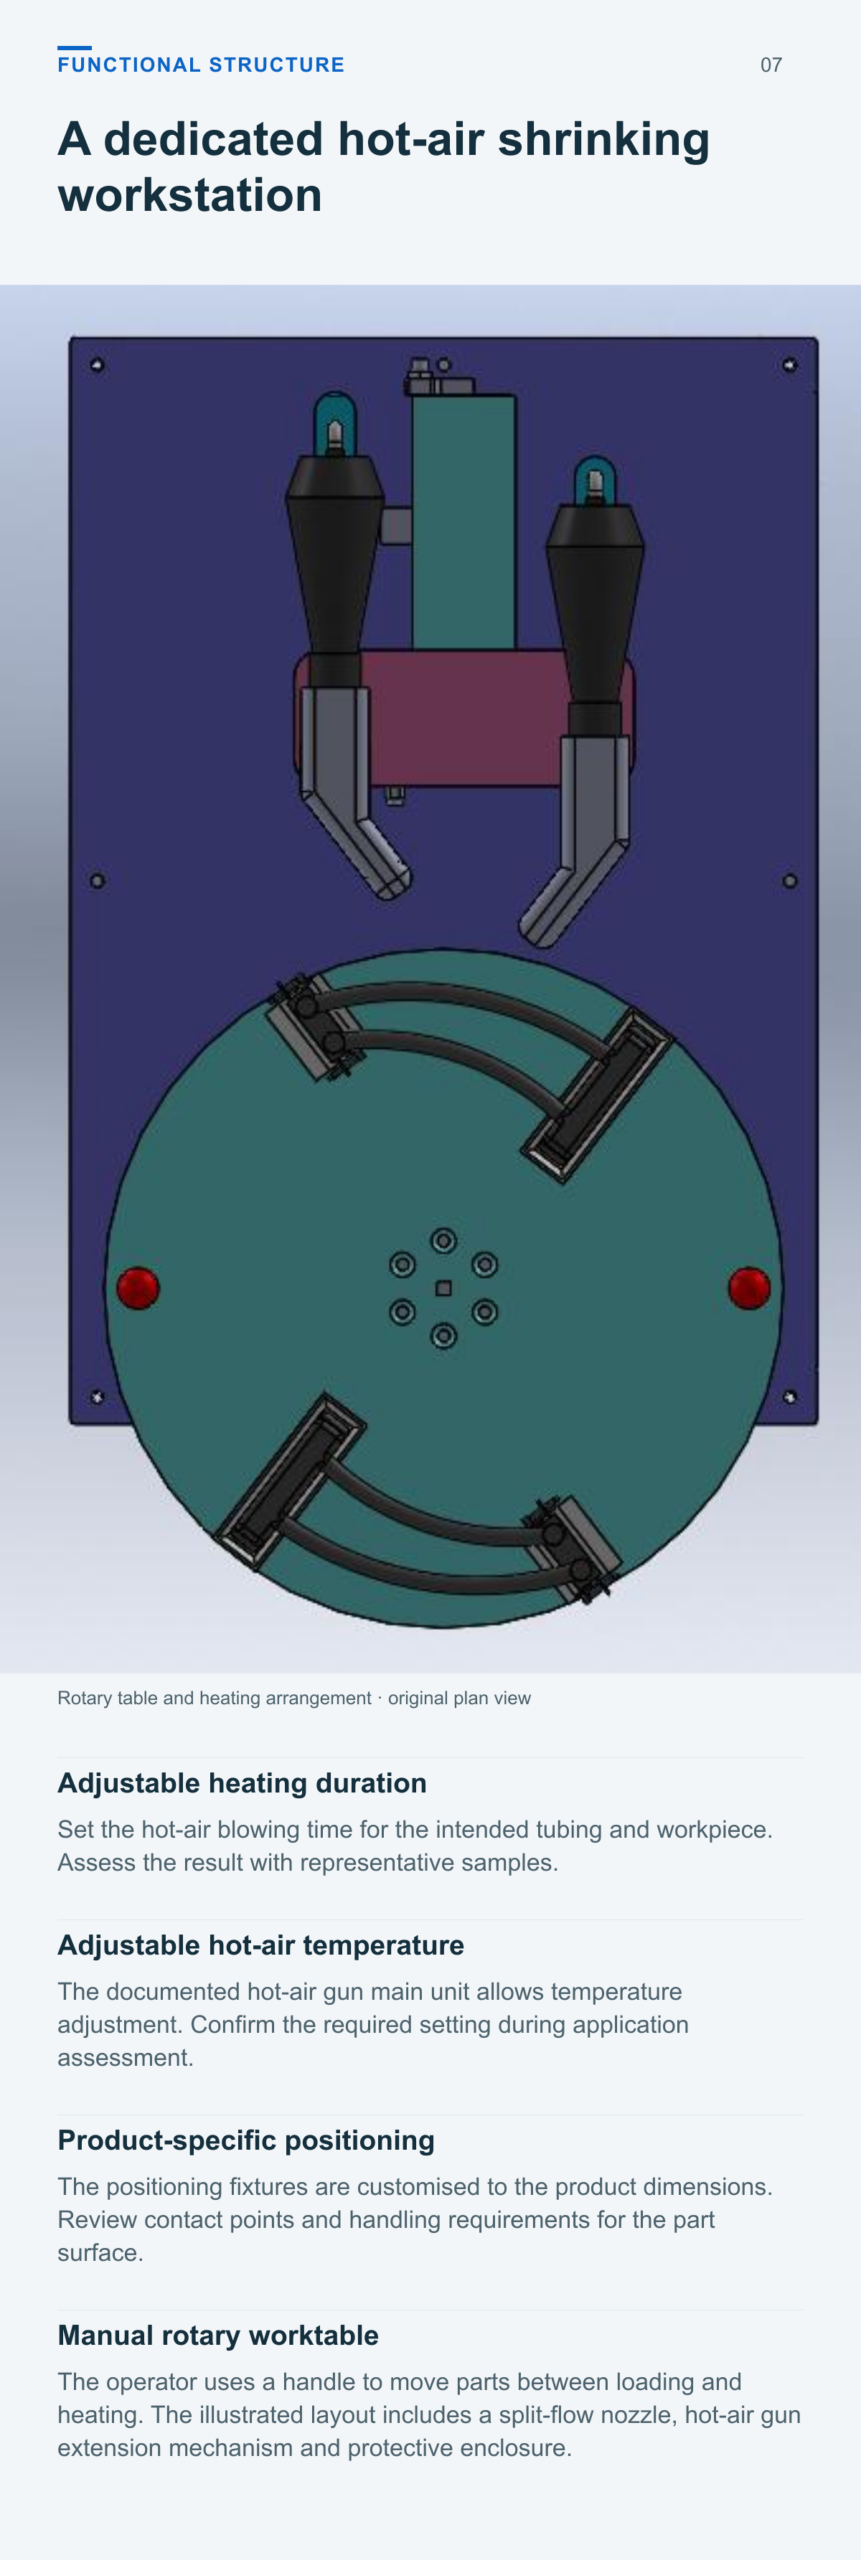
A dedicated hot air shrinking workstation
Adjustable heating duration
Set the hot-air blowing time for the intended tubing and workpiece. Assess the result with representative samples.
Adjustable hot air temperature
The documented hot-air gun main unit allows temperature adjustment. Confirm the required setting during application assessment.
Product specific positioning
The positioning fixtures are customised to the product dimensions. Review contact points and handling requirements for the part surface.
Manual rotary worktable
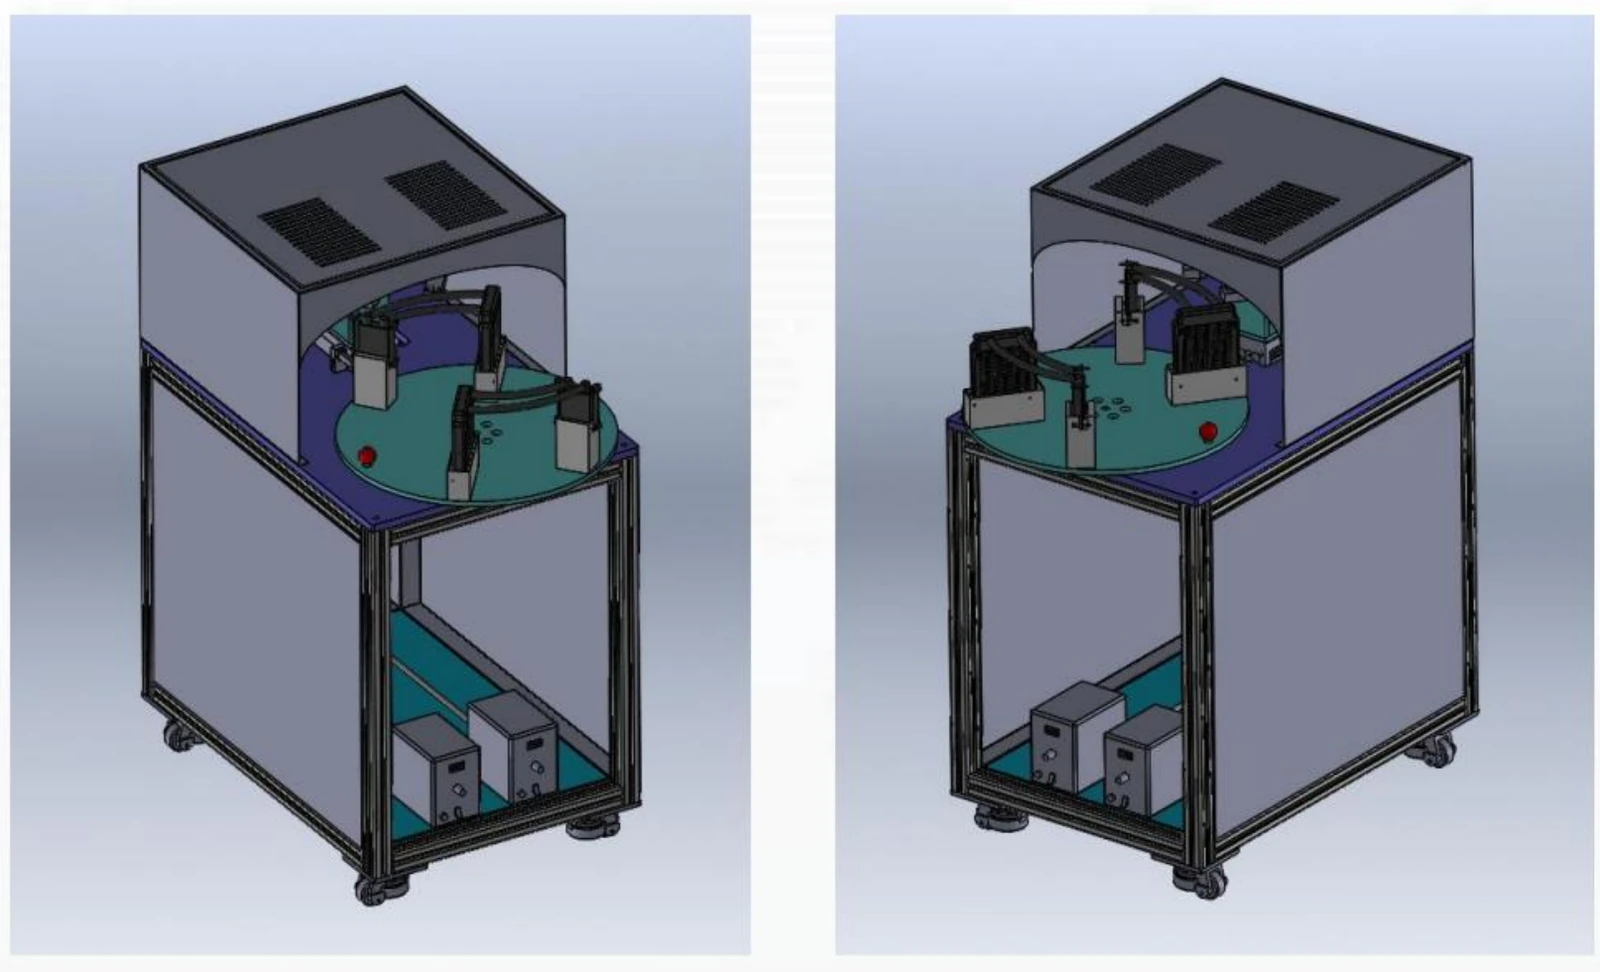
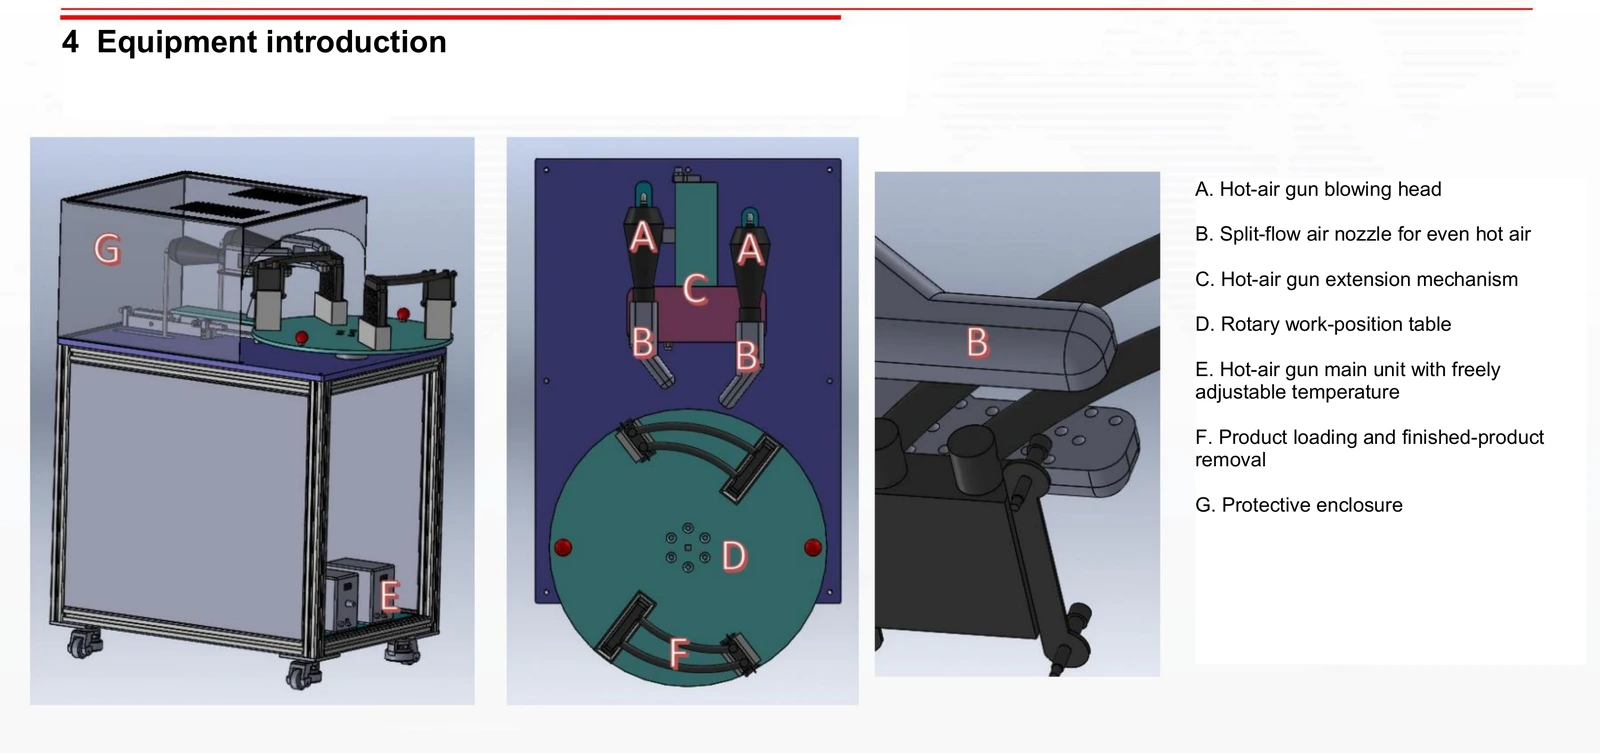
The operator uses a handle to move parts between loading and heating. The illustrated layout includes a split-flow nozzle, hot-air gun extension mechanism and protective enclosure.
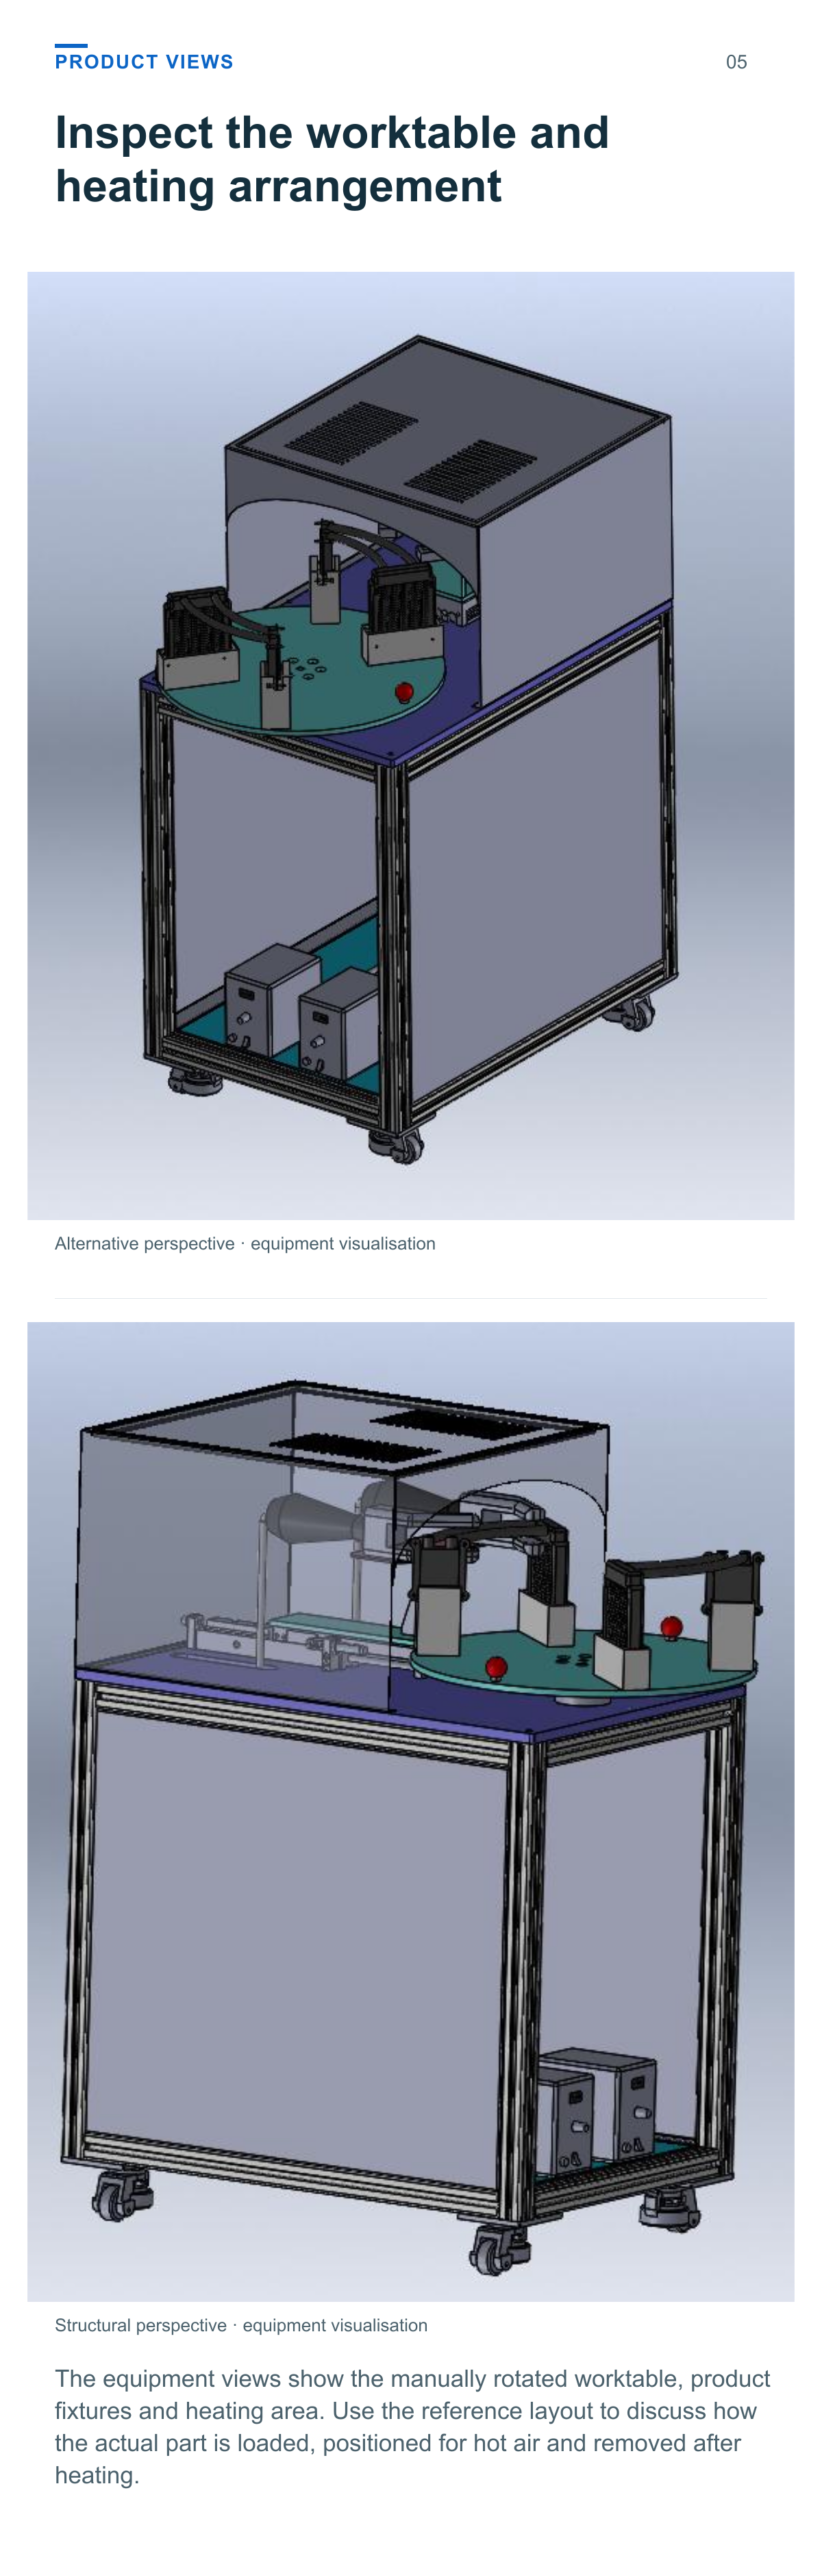
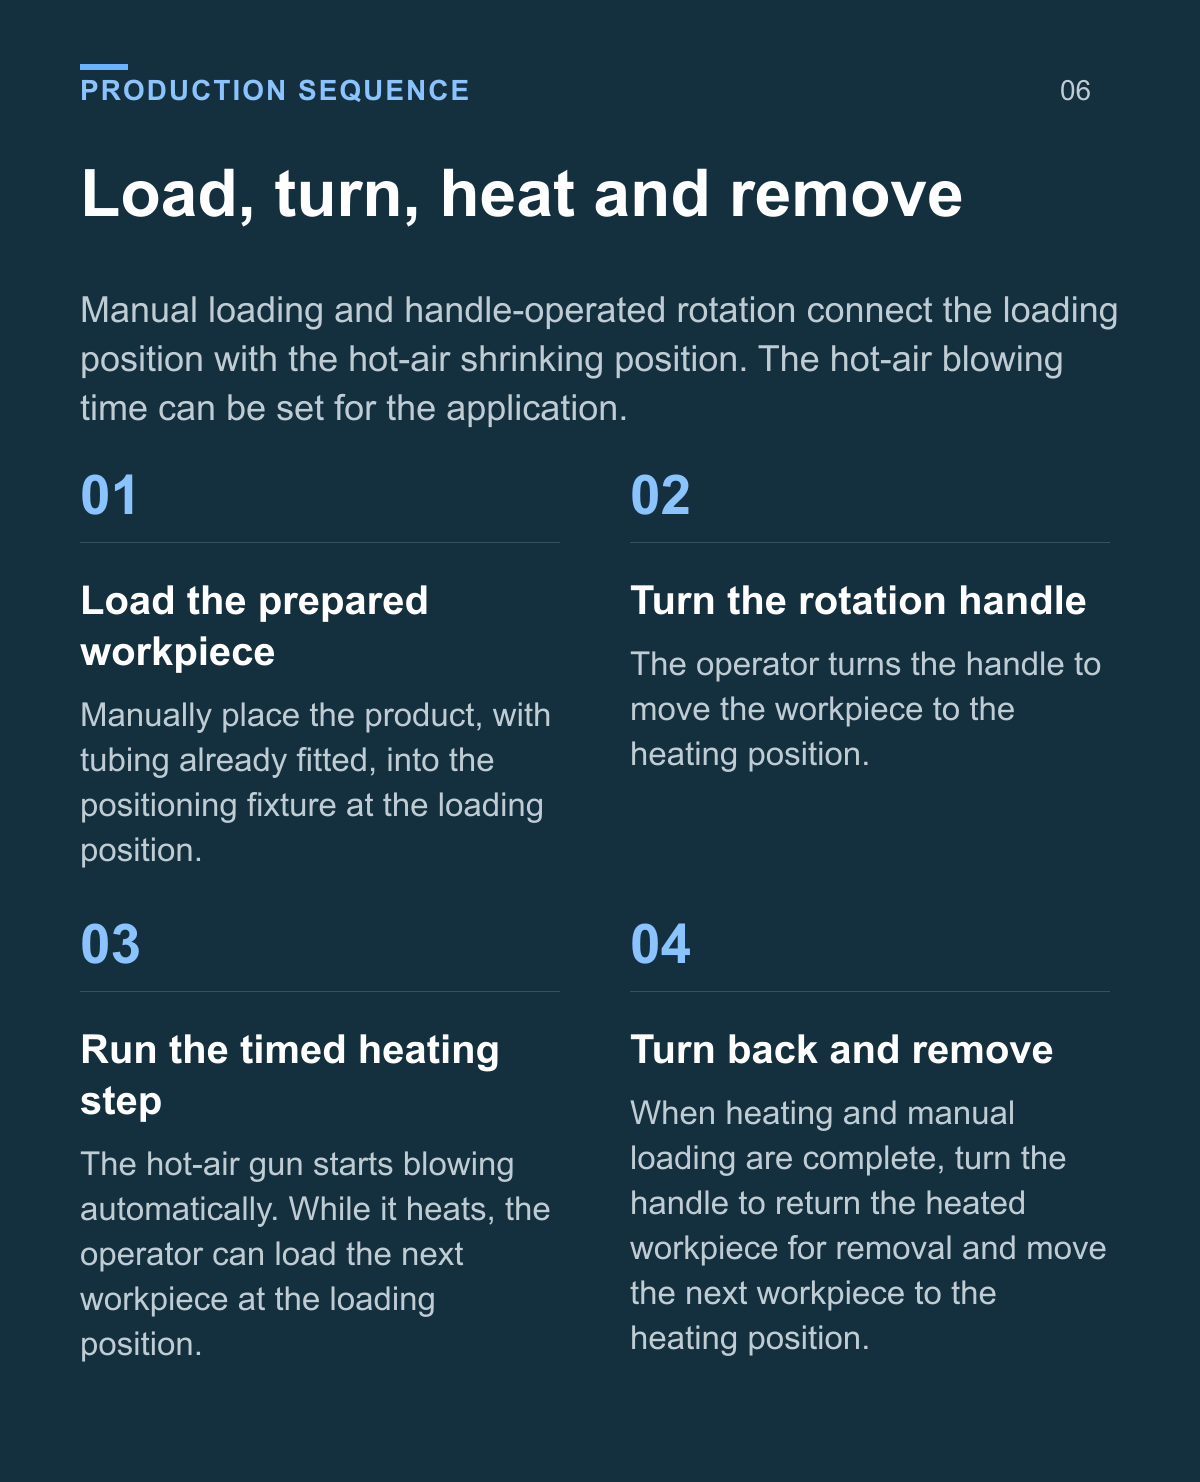
Inspect the worktable and heating arrangement
The equipment views show the manually rotated worktable, product fixtures and heating area. Use the reference layout to discuss how the actual part is loaded, positioned for hot air and removed after heating.
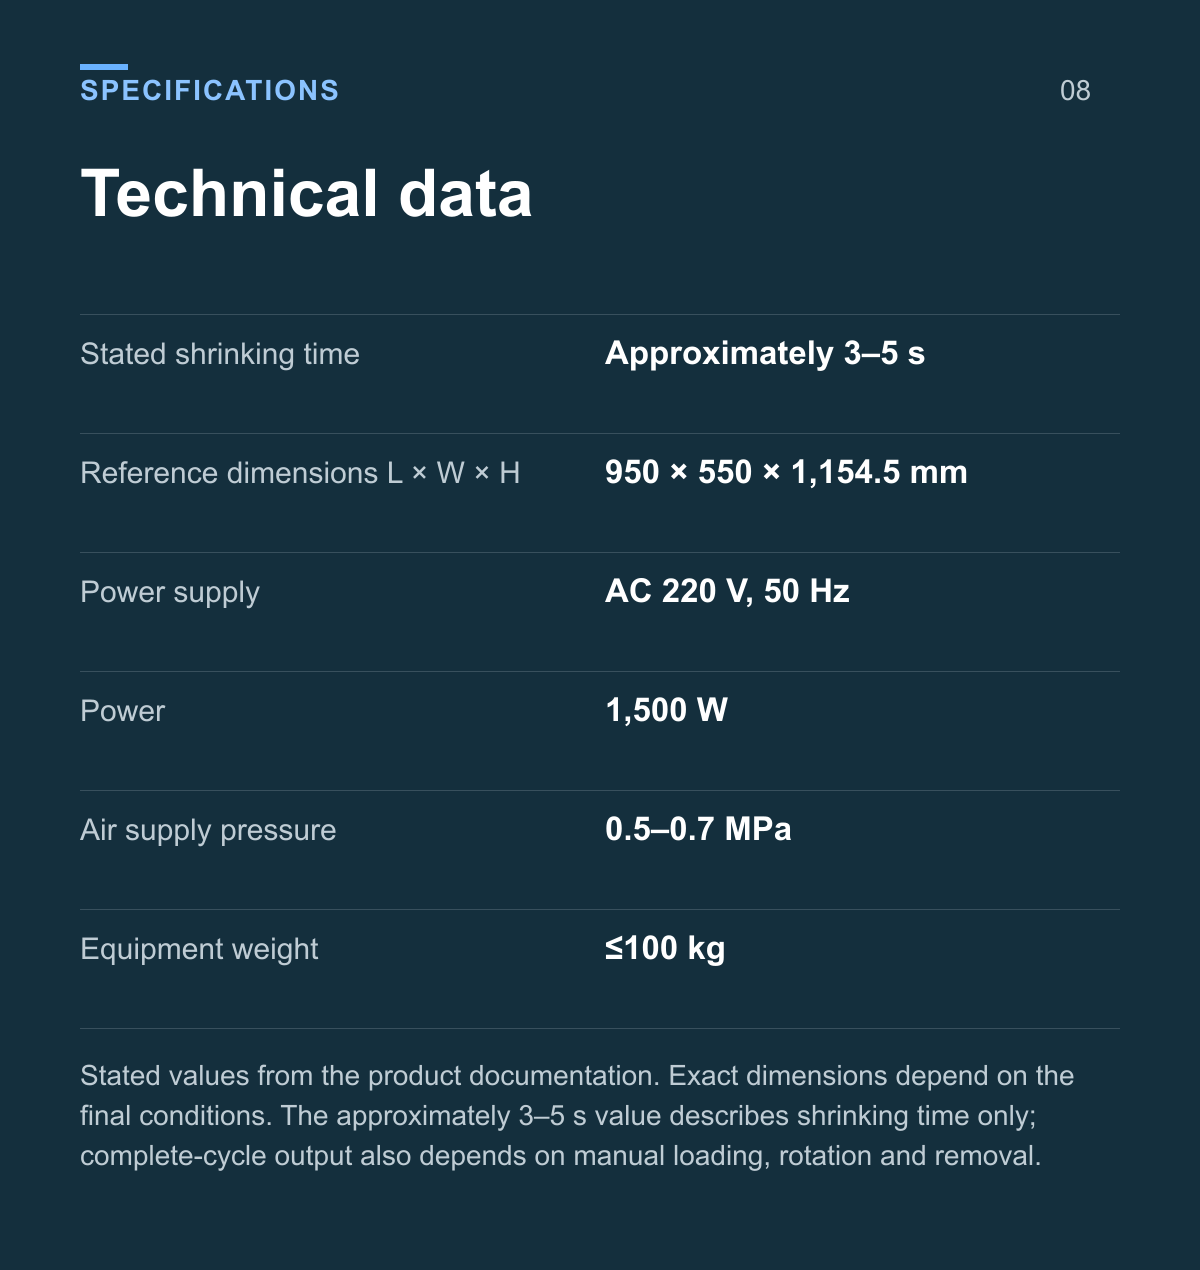
Technical data
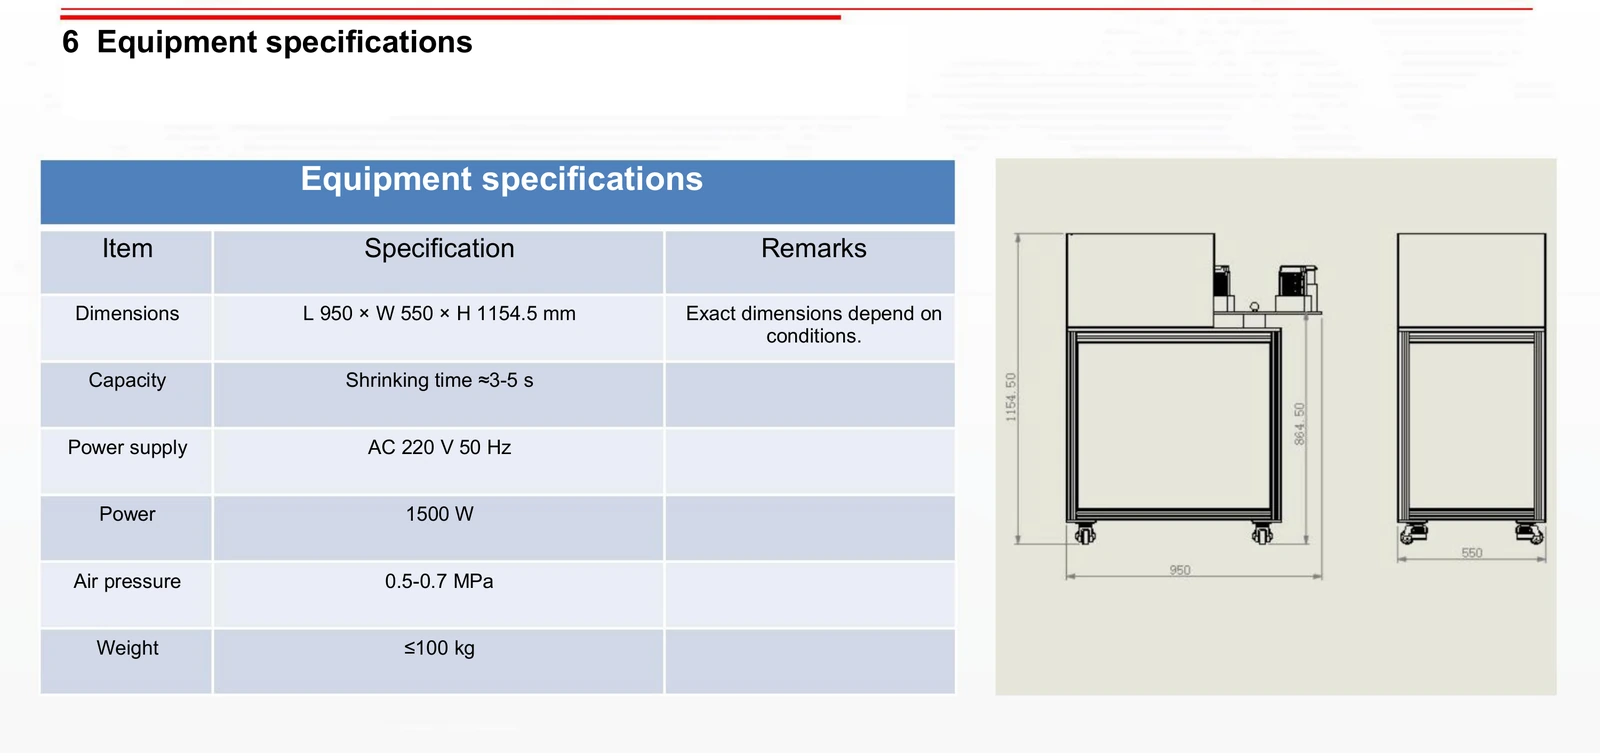
| Parameter | Value |
|---|---|
| Stated shrinking time | Approximately 3–5 s |
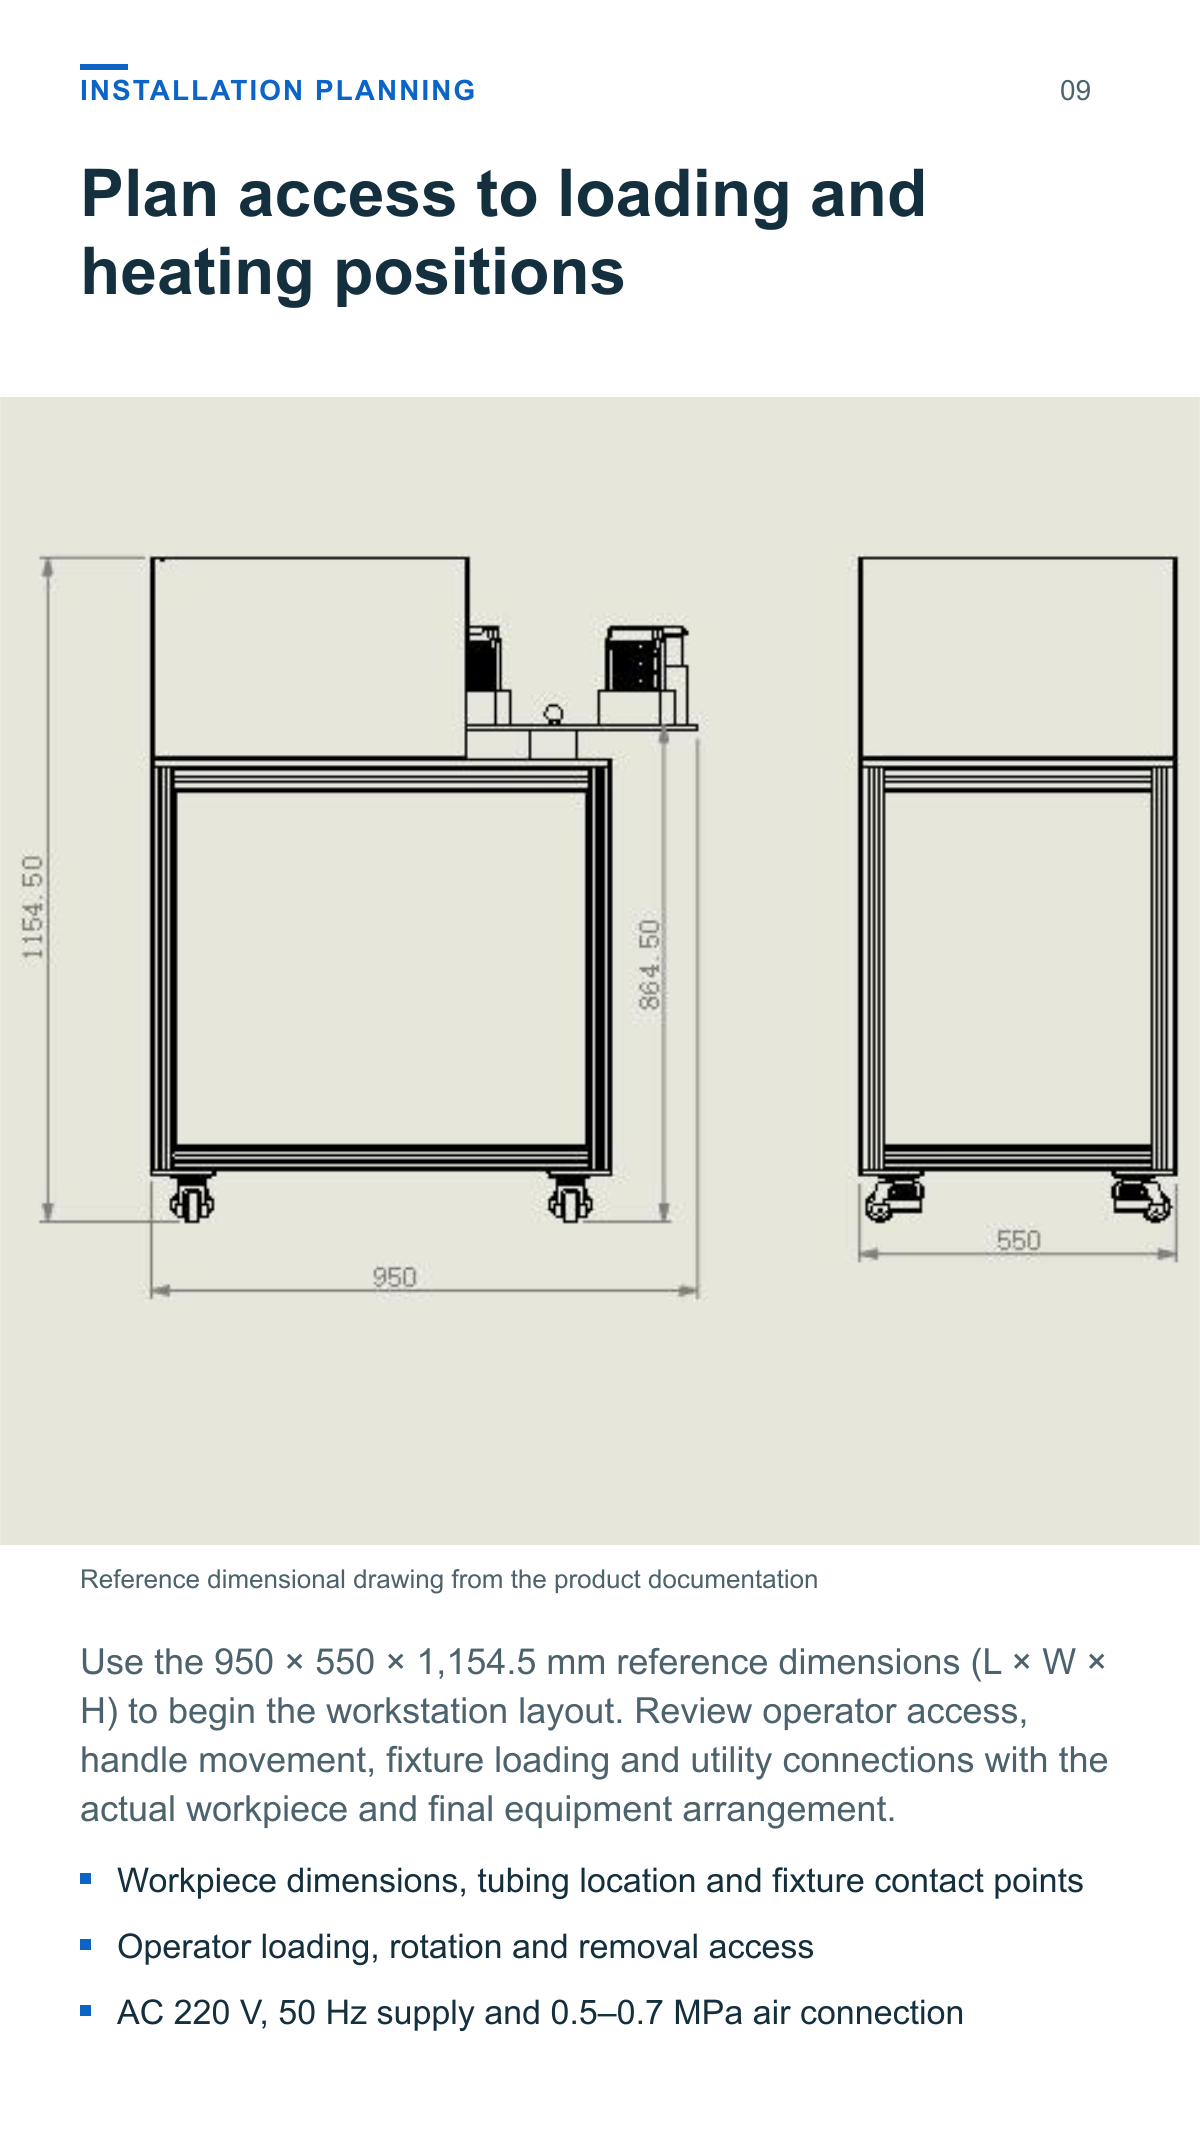
| Reference dimensions L × W × H | 950 × 550 × 1,154.5 mm |
| Power supply | AC 220 V, 50 Hz |
| Power | 1,500 W |
| Air supply pressure | 0.5–0.7 MPa |
| Equipment weight | ≤100 kg |
Stated values from the product documentation. Exact dimensions depend on the final conditions. The approximately 3–5 s value describes shrinking time only; complete-cycle output also depends on manual loading, rotation and removal.
Plan access to loading and heating positions
Use the 950 × 550 × 1,154.5 mm reference dimensions (L × W × H) to begin the workstation layout. Review operator access, handle movement, fixture loading and utility connections with the actual workpiece and final equipment arrangement.
- Workpiece dimensions, tubing location and fixture contact points
- Operator loading, rotation and removal access
- AC 220 V, 50 Hz supply and 0.5–0.7 MPa air connection
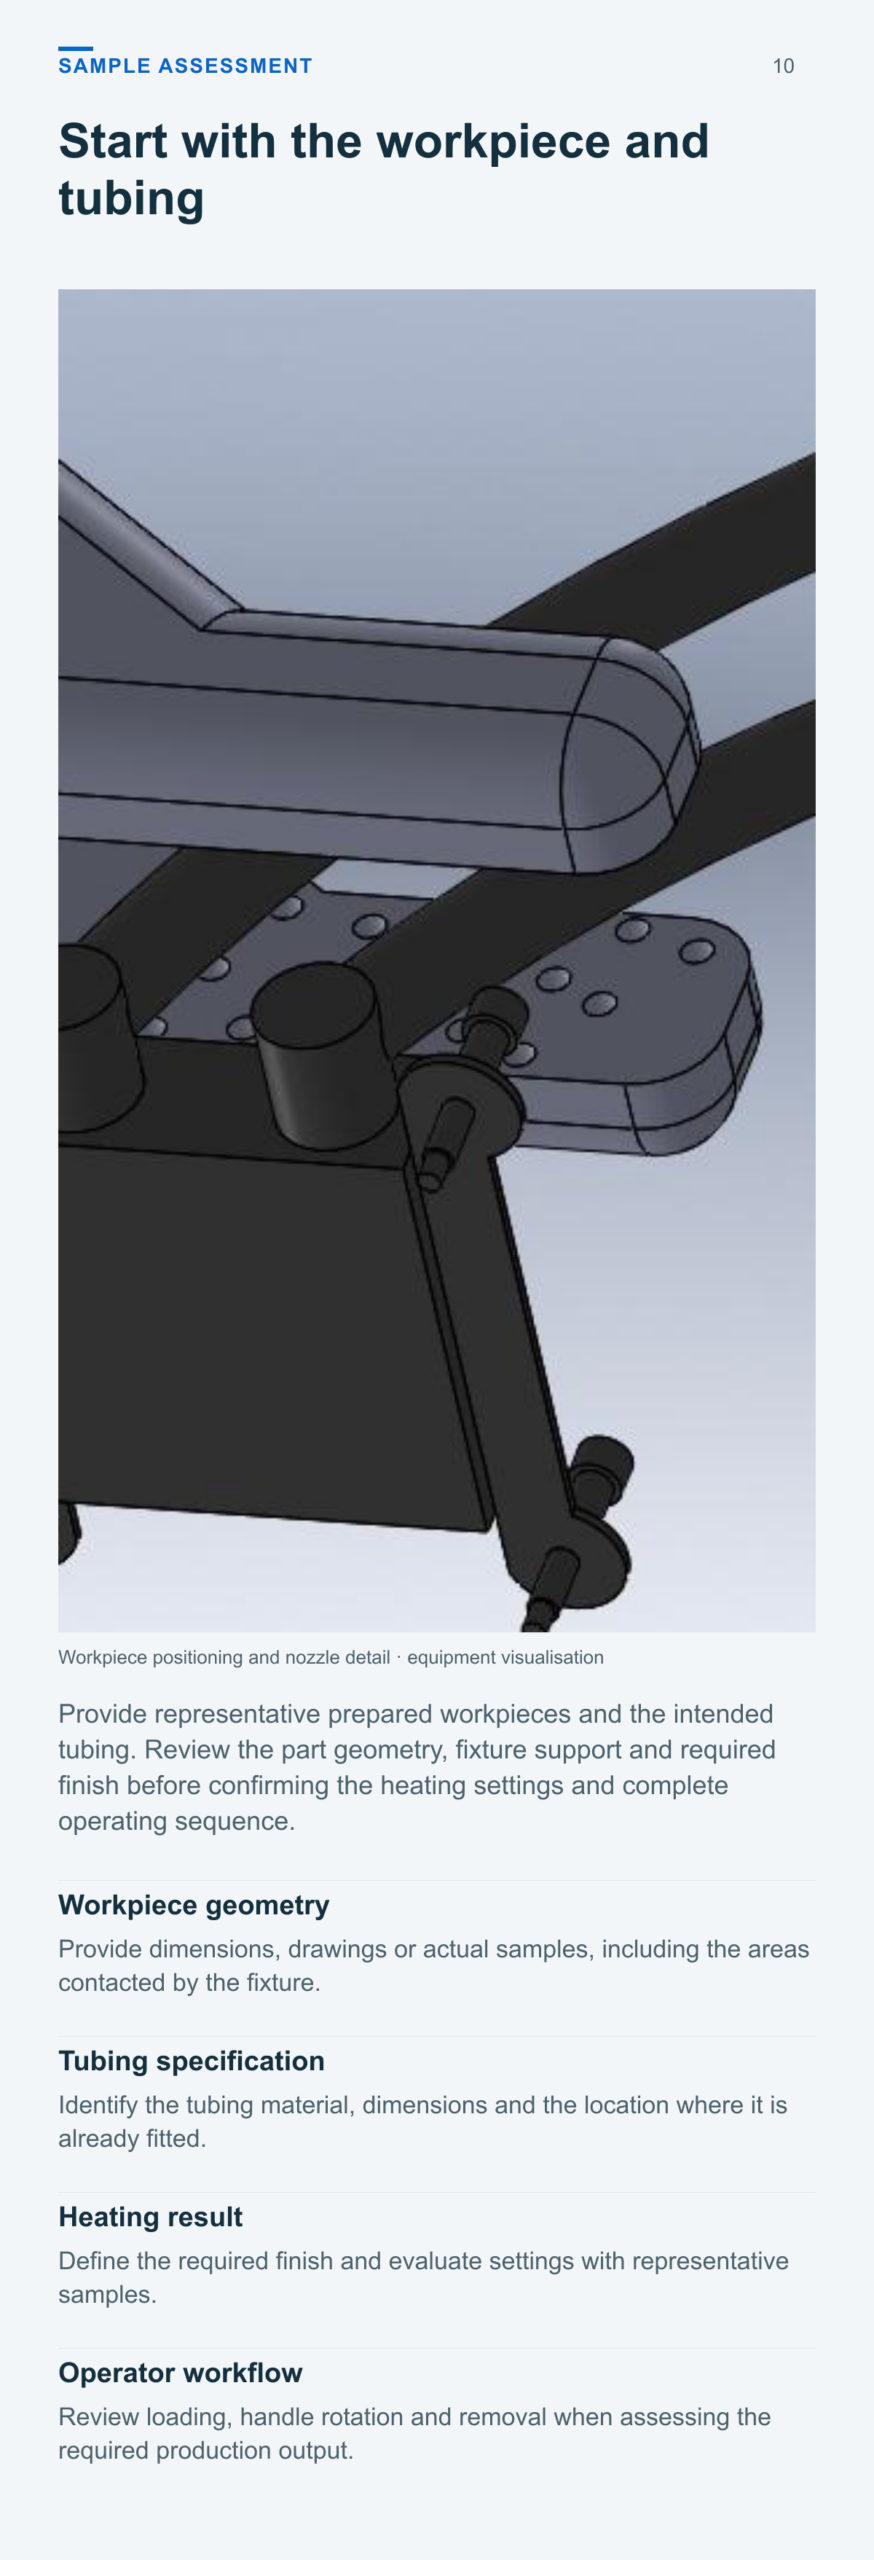
Start with the workpiece and tubing
Provide representative prepared workpieces and the intended tubing. Review the part geometry, fixture support and required finish before confirming the heating settings and complete operating sequence.
Workpiece geometry
Provide dimensions, drawings or actual samples, including the areas contacted by the fixture.
Tubing specification
Identify the tubing material, dimensions and the location where it is already fitted.
Heating result
Define the required finish and evaluate settings with representative samples.
Operator workflow
Review loading, handle rotation and removal when assessing the required production output.
Application questions
Does the machine fit the tubing to the part
The documented process starts with tubing already fitted to the workpiece. The operator loads that prepared workpiece into the positioning fixture for hot-air shrinking.
How is the worktable moved
The operator turns the handle to move parts between the loading and heating positions. Hot-air blowing starts automatically at the heating step, with an adjustable blowing duration.
Does 3 to 5 seconds describe the full cycle
No. It is the stated shrinking time. Loading, turning the table and removing the workpiece take additional time. Assess complete-cycle output with the intended part and operator workflow.
What is needed to assess another workpiece
Provide the part or drawing, tubing specification, intended shrink location, desired finish and production requirement. Review the fixture geometry, heating access and settings with representative samples.
Define your tubing heating application
Provide the prepared workpiece, tubing details and required finish to review the fixture arrangement, hot-air heating process and operator workflow.
Product views and application details